What is The Cost of Setting up a Pottery Studio at Home?
Pottery is an intricate art form that requires the right skills, techniques, and resources. Nowadays, there are studios that offer their equipment and materials for artists or hobbyists who wish to try pottery.
However, if you’re a ceramist or a potter who wants to take it to the next level by practicing on your own, you may be wondering: what does it take to build a pottery studio at home?
You can set up your own pottery studio at home for a few thousand dollars, specifically around $1,650 to a maximum of $4,500 depending on the equipment you will need. Building your own pottery studio can be done with the right tools and technical considerations. It is also important to have a set-up that creates an atmosphere where you’re comfortable and productive in.
Hunter-gatherers in early civilizations made ceramic pots by shaping clays into vessels and drying them under the sun.
Although potters still use most of these age-old tools and processes such as the classic potter’s wheel, it is important to note that there are other specific working areas and equipment that are integral in building your own pottery studio at home.
I will be sharing with you a complete guide on how to start a successful pottery studio and how much it will cost.
This guide will surely prepare you for building a studio that will allow you to create more functional and decorative art by making pots in the comfort of your own space.
Can you have a pottery studio at home?
Having your very own pottery studio at home is definitely possible with the right tools and proper planning. Pottery is a wonderful way of creating things from scratch using your skills and creativity and is accessible for artists and hobbyists who wish to hone their skills at home.
Pottery has a number of benefits for individuals. The art of pottery contributes to one’s self-expression, awareness of the present moment, and creativity, among others.
Having a pottery area at home allows you to conveniently and comfortably practice your art without the struggles of visiting a studio.
If you are dedicated and passionate to build your studio, just remember these 3 Ss and you can practice pottery at home in no time: Space, Safety, and Starter Kit.
What is a good size for a pottery studio?
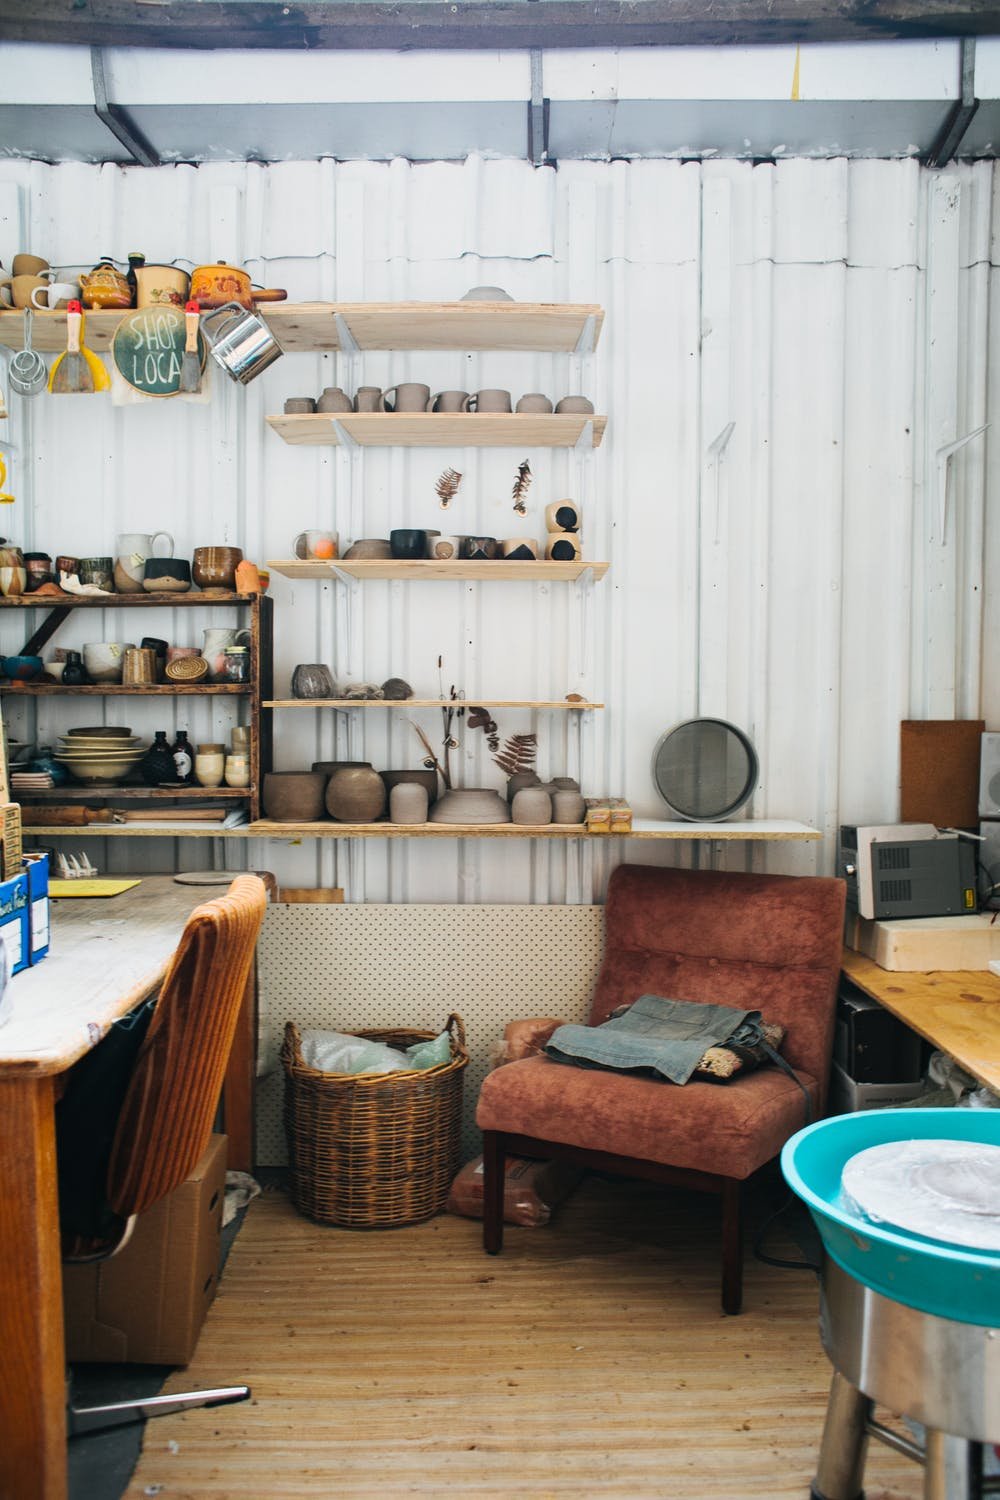
You can start your pottery studio with the available space that you have at home. Identify if you can clear out an unused room, build a separate shed if you have extra space in your backyard, or transform your garage into your very own studio.
For starters, you can use the average room size in the US of 132 square feet as a basis.
Don’t have that much space? That’s completely fine, as long as you can create a studio that you can comfortably work in.
Regardless of the size of the space that is available to you, the next important step is to go through your pottery process and identify an area for preparing your clay, working on the pottery wheel, and drying or using your kilns.
Measure all necessary equipment and consider the size of the storage you will be needing to ensure that you have enough room to move around.
[amazon box=”B01N683MRL”]
Each potter has its own style, whether it be throwing clay or hand-building. If you are throwing and using a wheel, the more space you need away from other areas or furniture at home since the clay can get messy.
If you are hand-building, a multi-use counter or a table can offer a more space-saving solution and is easier to clean up.
How do I organize my pottery studio?
A good question to ask yourself is: what is my workflow?
Section your pottery studio according to your flow so you can work with ease—starting from preparations, to your main workstation where you have your table or wheel, to moving pots to your kiln, and then bringing them to your storage.
Once you have that planned out, prepare for the technical considerations that you shouldn’t overlook.
Safety is one of the most important parts of building your studio. Plot out your tools’ wiring requirements and identify where you can safely install electrical sockets.
Make sure that your kiln is placed away from pets and children, and in an area with proper ventilation to avoid fire hazards. You would need to place heavy-duty kilns in a separate area from your main studio due to their fumes.
Consider using shelves and racks for your storage if you’re working with a small space. Visualize how you will be storing your pots based on size, design, or purpose to be able to choose the best shelving set-up.
I’m sure you would want to marvel at your art after a long day of working (as you rightfully should!) so place your storage where you can display your pieces properly.
Proper lighting is also an important aspect of creating your pieces. Pottery usually takes a lot of time and you may be working through day and night, so it is essential to have sufficient lighting that is suitable for any time of the day.
The ideal lighting setup will allow you to see your work in detail— letting natural light in can help with your creative juices and productivity level.

How do I start a pottery studio? (what do you need) – a list
Assuming that you already have a space at home, all you need now are the tools and equipment essential for pottery or in other words: your Starter Kit. Ready to build your studio? The list of equipment below will get you started:
Pottery Wheel
A Pottery Wheel is used to shape and mold the clay into your desired form. A potter who makes pots using the throwing method uses a wheel which requires a certain level of skill and practice.
You can operate the wheel electrically or by manually stepping on a pedal, and once it’s spinning you can form clay by using various hand motions such as pressing, pushing, and molding on the wheel.
[amazon box=”B09FJR8SLK”]
Throwing Tools
Throwing Tools are used when using a pottery wheel in order to get a certain design or outcome. These come in various shapes ribbon or carving tools, rulers, wires, sponges, and more.
Table or Stand
A Table or Stand is essential for the hand-building method. As the pottery wheel, this will be your main workspace. Ideally, your stand should be adjusted to your height or level when working to make clay shaping and molding easier for you.
Kilns
Turning clay into pots wouldn’t be possible without Kilns, the main equipment used to bake clay using heat. Kilns are available in various brands, sizes, and materials, so be sure to choose the right one for you.
[amazon box=”B07H43Q81K”]
Shelves or Racks
Shelves or Racks are nice-to-haves especially when you’re starting your own studio at home. A well-thought-out and organized shelving system will help with the space-saving and visual aspects of your studio.
How much does it cost to start a pottery studio?
Now that you have learned about the essential factors of building a studio, the next step is to plan a cost-efficient way of starting it within your given budget.
Assess the kind of equipment you will be needing: manual or electrical? Commercial or high-end? This will help you narrow down your estimates.
A pottery wheel can cost around $400 to $2,000, a Kiln can range from $750 to $2,000, and tables, shelves, and other tools can fit into a $500 budget.
In total, you can spend a minimum of $1,650 to a maximum of $4,500 when building your own pottery studio at home.
Do note that the cost heavily depends on your needs as a potter and the resources already available to you.