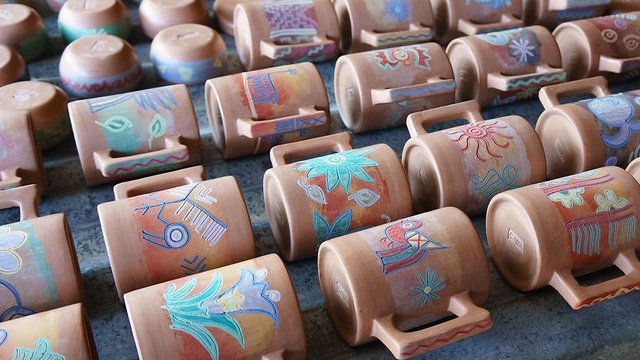
How Do You Make Burnished Mugs?
The ancients hardened and waterproofed their pottery by burnishing before they discovered glazing. Burnishing can give pottery a glossy, soft sheen without using ceramic glazes. It is an alternative to glazed pottery. Is it possible to make food-safe burnished pottery?
Fire burnished pottery to 2345 0F (cone 10) if you want it to be food-safe. They become vitrified and non-porous at this temperature. Upon reaching 2345 0F, burnished pottery becomes waterproof and safe for food consumption.
Burnishing prepares pottery for the pit, saggar, or raku firing. All involve firing at a lower temperature. You can burn pottery on your lap or with a cushion. It is also possible to do this using a pottery wheel.
Is Burnished Pottery Food Safe?
Make Burnished Mugs and Burnished pottery is not food safe unless you fire them to 2345 0F or higher. This high temperature can make burnished pottery nonporous. Burnished items are only suitable for decorating until they become nonporous.
At What Stage Do You Burnish Pottery? Can You Burnish After Firing?
The leather-hard stage of greenware is ideal for burnishing. For best results, choose leather-hard clay that is on the stiffer side. Clay is on the verge of drying at this point. Burnishing pottery before it has reached its complete dryness is easier.
Clay with enough moisture helps your stone to glide across it without scratching. The clay texture plays a vital role here. It is easier for leather-hard clay particles to flatten and align since it is softer than bone-dry clay.
Finer particles rise to the surface when the grog penetrates deeper into the clay. Clay that is too moist will have distinct ridges left behind by the burnishing tool. It will lose most of its shine as it dries.
As the leather-hard clay becomes stiff, it is almost dry but has not yet changed color. Burnish the pot at this point and cover it for a slow curing process. This method has the disadvantage that you cannot sand the pot before burning.
The most suitable clay bodies to burnish are earthenware and low-fire clay. The clay body needs to be thin and free of grog or sand.
What Can You Use To Burnish Clay?
When burnishing clay, you can rub it with a rigid object like a smooth pebble or the back of a spoon. A stiff and smooth surface is the primary necessity for this object. Stones can yield a higher level of sheen, but it requires a lot of practice and time.
Stones help you create a smooth surface free of brush strokes and drips. You can also burnish without worrying about the surface chipping off. You can use any other glossy object instead of stones.
Many potters use rubber or plastic ribs on leather-hard pots. It is popular to use the back of a metal spoon for this purpose. Potters prefer this method even though the spoon’s back can leave grayish marks on clay.
Some potters use burned-out glass bulbs of various sizes on leather-hard clay. They find it easier to grip and manipulate.
Are There Any Burnishing Techniques I Can Practice?
Before burnishing, clean your pottery’s surface to avoid patchy results. Use a metal rib to scrape clay. To burnish, rub back and forth, use circular motions, or make longer strokes. It is less tiring and easier to build speed with shorter back-and-forth action.
Whatever method you choose, change the direction of your stroke to avoid lines and ridges. Moisture will darken the burnished area when it comes into contact with the surface as you burnish. As a result, you can see what areas you have already burnt.
Watch this video to learn some burnishing techniques.
Is It Easy To Burnish Clay Using A Pottery Wheel?
Similar to trimming, burnishing on the wheel involves a similar action. The most appropriate time to do this is after the trimming process. When turning the wheel, run a metal rib over the pot’s surface to remove any circular marks.
As the pottery rotates on the wheel, hold your burnishing tool against it. In this video, you will learn how to burnish and trim a bowl using the wheel.
Why Is Burnishing Leather-Hard Clay Beneficial?
Some of the shine fades away when the clay shrinks as it dries. Upon becoming bone dry, even stiff leather-hard clay contracts a bit. You will have to burnish it again once it has dried out.
Upon burning leather-hard clay, you will already have smoothed the surface. The second burnishing will be convenient when it is dry. But it may have lost some of its shine. As you repeat the process, you will spend less time on it.
When pottery has reached its final stage of dryness, burnishing becomes challenging. To prevent the pottery surface from scratching, you will need a source of moisture.
Apply a bit of water with a sponge to the bone dry surface and burnish it. Use the sponge to dampen each section as you burnish it. To achieve a more reflective effect, moisten and burnish an area twice.
Does Bone Dry Clay Need Any Particular Methods For Burnishing?
Some potters prefer to burnish bone-dry clay as leather-hard clay shrinks and loses its shine. Burnishing bone dry clay gives you the chance to sand it. It smoothens the pottery surface and helps round the rim of the pot. Wear a respirator mask while sanding.
Start with higher grit sandpaper if the surface needs a lot of sanding. The mesh-like structure of drywall sanding screens is ideal for this job.
Once you have removed the larger areas, follow up with fine-grade sandpaper. Greenware is delicate, so a well-seasoned old kitchen scrubbing towel will be appropriate.
Use lubricant when burning dry clay to prevent dust from smearing on the clay surface. The moisturizer also helps remove tiny scratches left by sanding.
It can either be water, oil, or a combination of both. It is possible to use vegetable oil, mineral oil, baby oil, or solid cooking oil as a lubricant.
Using Terra Sigillata is another way to burnish clay. This refined clay slip gives clay surfaces a high shine when painted over and polished. You can either buy terra sigillata or prepare your own. To polish terra sigillata, you can use your fingertips, a mitt, a soft sponge, or even a plastic grocery bag.