How to Build a Kiln for Pottery? Beginners Guide!
Making your own kiln has many advantages. With it, you can do a lot of pottery projects and fire them at your own pace. You can work larger items than you could with a tabletop kiln. Would it be easy for me to build a kiln for Pottery myself?
You can build your own DIY kiln for pottery depending on your space, resources, requirements, and potential. It is simple and helps you save a lot of time and money. The simplest and most primitive form of a kiln is just a trench or pit dug into the ground.
Kilns are ovens that bake clay objects to harden them into pottery, tiles, or bricks. It consists of a chamber with thermal insulation for hardening, drying, or chemical changes. The temperatures reached in some kilns are comparable to those of furnaces rather than ovens.
The two main types of kilns are intermittent (periodic) and continuous (tunnel). Industrial production uses continuous kilns. Potters are more familiar with intermittent kilns.
Updraft, downdraft, sprung arch, catenary arch, hill-climbing, bottle, car, and top-hat kilns are among the most common types of intermittent kilns.
Pit firing, fire brick kiln, primitive mud-clay method, and barrel kiln are simple ways of building kilns at home. The oldest known method of pottery firing is pit firing, which dates back to 29 000 BCE.
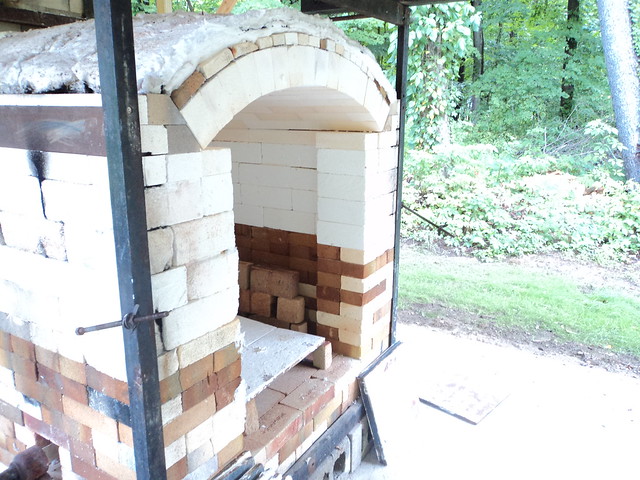
The use of bricks for building a kiln is very flexible. Most of the time it is similar to pit firing and works the same way. So, you are making a pit-like structure into which you can place combustibles and pottery.
How Do I Build A Brick Kiln For Pottery?
To build your kiln, you have a variety of designs to choose from, including square and cylindrical. For beginners, square structures are simpler to construct.
Choosing The Right Brick Type For A Kiln (Build a Kiln for Pottery)
Firebricks (refractory bricks) provide additional insulation and can withstand extreme temperatures and various atmospheric conditions. They are made of clay containing alumina and silica and are less porous by nature. A medium-grade firebrick is more heat resistant. It resists cracking from constant heating.
Redbricks are a viable substitute for firebricks due to their low price. Redbrick functions almost the same way as firebricks. But they are not as durable and sturdy as firebricks.
Where Should I Build My Kiln?
Find a place with a fair amount of space, a water source nearby, and a safe distance from your home. It is preferable to be at least fifteen feet away from any buildings.
What Are The Steps For Building The Kiln?
Dig into the ground about the depth of a brick to give the structure a little more stability. Start building the kiln’s base by laying bricks on the ground. Lay seven bricks around the base.
To bind the bricks together, prepare a mud mortar. It is better to have sand and clay in the same proportions. Bind the bricks by laying them one on top of the other using mud mortar.
For you to place the pottery above the fire, there needs to be a grate. Install bolts into three or four bricks by drilling holes in them. By doing this, you can replace both the bolts and the grid when they wear out from extreme heat.
For this purpose, you can place a heavy-duty barbecue grill on the bolts. It is durable and can withstand heat.
Make a hole in the wall where you can insert a thermocouple to measure the internal temperature. To do this, roll a corn husk and place it in between the bricks. Then cover it with mud mortar. Upon firing the kiln, the husk will burn out, leaving a hole behind.
Build a chimney using bricks or make a hole at one end to insert a pipe. It draws heat away from the chamber, providing efficient, even heating. Watch this video to learn how to build a brick kiln step by step.
Is It Possible To Use Lime-Based Mortar Instead Of Mud Mortar?
Standard brick mortar or lime-based mortar cannot withstand the extreme heat of a kiln. They will crack and fall apart over time. As mud mortar is made of the same material as bricks, it is a better choice.
A disadvantage of mud mortar is that it is not stabilized, and therefore cannot withstand rain or moisture. In order to prevent moisture intrusion cover your kiln from both the top and bottom. You can build the kiln on a concrete platform to prevent moisture that rising from the ground.
how many bricks are needed for a Kiln?
It depends on the volume of the kiln that you intend to construct. The number will rise if you construct a stable base for the kiln. Building a brick chimney will require more bricks.
Approximate Cost Of Building A Brick Kiln
The cost of building a small kiln about 3 feet tall using 107 bricks will be about $110. Here, the heavy-duty barbecue grid costs the same as bricks.
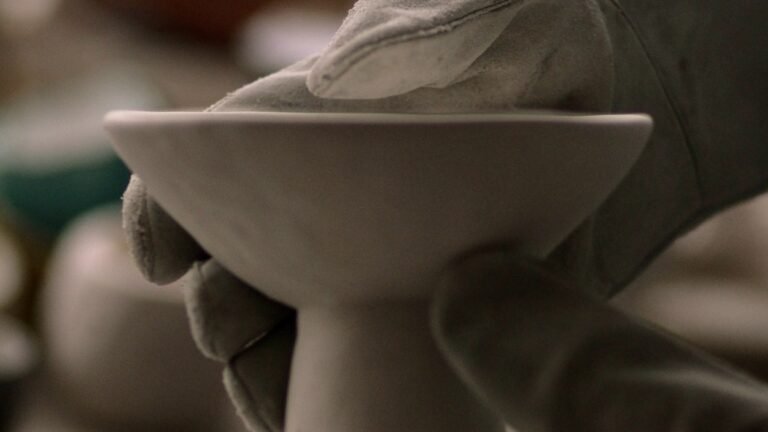
How Can I Fire Pottery In My Kiln?
When the mud is dry, you can use your Kiln after about a week. Fire the kiln after allowing enough time for all the moisture to evaporate from the mortar.
Starting with a layer of sawdust is one way to burn, but you can also use other combustible materials. Place a layer of pottery, then cover it with sawdust or wood chips. Use the metal grid to place several layers of pottery into the kiln. Sprinkle sawdust over each layer.
Cover the top of your pile with paper or dried leaves after you load your kiln. During the burn, you can add large pieces of wood as you would in a regular fire. Cover the top of the kiln with a corrugated iron sheet after the fire has taken hold. Put some bricks on the sides of the sheet to weigh it down.
Allow your kiln to burn for about 12 hours, or until it burns itself out. To unpack the kiln, wait until the fire is out and the kiln is cool.
The firing process allows you to create many patterns and colors on the pottery. Prior to burning, surround the pots with organic material like leaves, fruit peels, or metal oxides and sulfides.