Why is glaze not sticking to bisque? (Explained for Beginners)
In pottery, a bisque or bisqueware is a ceramic material that has already been fired once using a kiln or the machine used to harden the clay through heat or fire. Once you have already bisque the ceramic piece, the next part would be glazing, or the process of coating the ceramic piece to make it waterproof, food-safe, and visually appealing. However, one of the problems encountered during glazing a bisqueware is the glaze not sticking to the ceramic, so you may be wondering: why does this happen and what’s the solution?
When a glaze or coating is not sticking to the bisque, this could be due to crawling. Crawling is when the glaze separates, clumps together, or falls off because the ceramic was too wet, has dust or lose particles on its surface, or the glaze is too thick. To avoid this, the ceramic should not be washed but instead, be wiped with a damp sponge to clean the surface.
You should also be mindful of the consistency of the glaze and the thickness of the layers, as a thick glaze layer will cause it to crack and separate from the ceramic.
Glazing the bisque properly is a crucial step for creating a successful piece. It involves specific steps and instructions that you should always remember especially if you are still starting out as a ceramist or potter. A glaze comes in various colors and would make your piece stand out when done right.
If you are currently experiencing difficulties in making your glaze stick to your bisque or if you have experienced this in your past projects, make sure to read through this guide to get all the answers and solutions you need.
What Would Cause The Glaze Not To Stick Onto Pottery Before Firing?
Have you ever wondered how potters transform ceramic pots from having a rough texture and only one color into having a glass-like coating, multiple colors, and designs? This is done through glazing. A glaze is made up of minerals that are finely grounded to form a paint-like consistency and turn into solid, shiny coats of ceramic pieces when heated in a kiln.
However, before you prepare the pieces in a kiln for firing, you must first apply the glaze properly on the ceramic piece. Ensure that you have the right tools and techniques and familiarize yourself with the characteristics of glaze. Glazing the piece without proper procedures and preparations will cause the glaze to not stick on the piece.
This occurrence is also called “crawling.’ A glaze has shrunk and sticking properties that allow it to stick to the surface of the material. Crawling happens when there is shrinking and less sticking so the glaze tends to separate, crack, clump together, create patches, or fall off. There are a few reasons why crawling happens and it is important to avoid glazing your pieces in these ways.
Why Does My Glaze Separate?
One reason for crawling is that the piece may still be too wet. This happens if you wash the bisque after firing and glaze the piece in a hurry so you skip out the drying part. As a result, the glaze on top of the ceramic will not dry immediately and will have a difficult time sticking to the material because the surface is not dry enough for it to absorb the glaze.
Another reason is that the bisque may still be dirty or there is dust and loose particles on the surface. This will cause the glaze to not adhere directly to the ceramic. You may notice that when this happens, the glaze may dry but it will still fall off.
What Happens If You Apply Too Much Glaze?
One thing you should also avoid is putting a very thick coat of glaze on the ceramic. This will also cause crawling, since the second or third layer will make the first layer wet again, therefore lessening its cling to the material. The main indication for too much glaze would be cracking and falling off of the glaze.
Make sure that when glazing your bisqueware, you are given time for intervals between each coat to dry. Use a brush and a gentle motion when applying the glaze if you want to practice putting the right amount of glaze on your ceramic. It is recommended that you don’t go below or beyond 3 layers of glaze.

What Should You Do Before Adding Glaze To Bisqueware?
Instead of washing your bisqueware, dampen your bisqueware with a sponge or a cloth while making sure you are not making it too wet. This will help remove the particles that may be sitting on top of the surface, therefore allowing the glaze to stick to the ceramic properly. Before using the glaze, make sure to give the container a little shake or stir.
Aside from proper bisqueware procedures pre-glazing, another great way to have successful glazing is to clean your work area. This will allow you to concentrate better on glazing and will avoid unnecessary materials from touching your pieces while you are glazing them. Also, make sure that your work area is well-lit and ventilated since the ingestion or inhalation of glaze may cause health risks.
A common mistake when you’re working on a messy setup is that you may confuse the colors of your glaze — so make sure you organize them, read the color labels before using them, or create labels so you can easily identify them from each other.
How Can Glaze Be Applied To Bisqueware?
Glaze can be applied to bisqueware in many more creative ways aside from the usual brush painting technique. Below are various methods you can try when glazing a bisqueware so you can determine which one suits your technique best.
Dipping
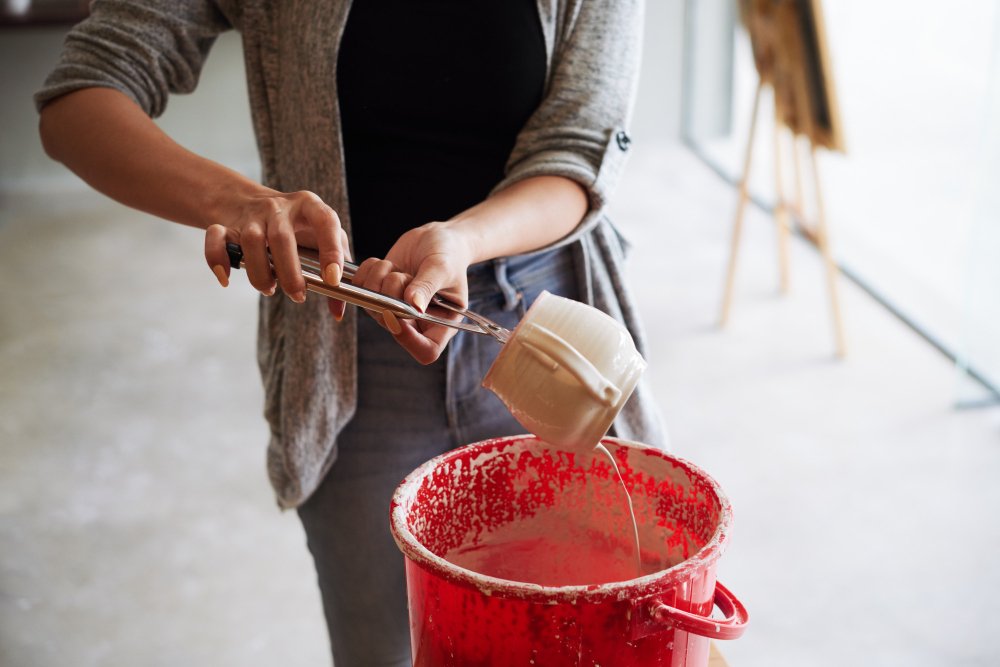
Dipping is simply putting your piece in a container filled with glaze. Dipping will help the glaze spread evenly throughout the ceramic but you should be careful with its consistency since it may be too thin or thick. The key is to stir the glaze consistently and slowly add water when finding the right consistency.
Spraying
You can either use a professional airbrush or a regular spray bottle for this method, depending on the outcome you want to achieve. The airbrush method is one of the quickest ways to glaze pieces since the amount of glaze can be easily controlled. However, do take note that you need proper ventilation in your workspace and the appropriate face mask or respirator when using the spraying technique.
Sponging
Sponging is a more creative and intricate way of glazing your ceramic. This is mostly used for blending out colors that merge smoothly with each other and for adding a touch of color to certain textures. You must clean your sponge before using another color or in between glazing sessions to avoid unintended colors to blend.
Bubble Glazing
If you wish to add more artistic flair to your piece, try bubble glazing. This is done by creating bubbles using a mixture of glaze, soap, and water, then letting the bubbles touch the surface of the ceramic. Do note that this won’t yield an even coating, instead, it will give a unique pattern to your piece.
Tape Glazing
Another method is using masking tape to create finer lines of glaze on a piece. This will result in a more geometric pattern and clean lines such as stripes. Like bubble glazing, this won’t yield a consistent layer of coating but is used for more decorative purposes.
Feel free to explore your own artistic expression when choosing a technique for glazing. It is vital that you are aware of the various ways you can ensure that the glaze can stick to your ceramic so you can save time, effort, and resources. A successfully glazed bisque is a product of good attention to detail and practice.


