How do You Add Slip to Pottery? Easy and Creative!
I am certain that everyone has seen those beautiful pottery pieces with intricate designs, and wanted to try doing the same thing. While most people would probably be able to guess that those decorations are made with slips, it can still feel a bit intimidating, but don’t worry! I am here to help you with your question about adding slip to pottery.
To start off, there are many techniques of adding slips to pottery, and all of them will create different results. Some of them are as simple as just trailing the slip over the piece, while others allow you to make compext images. Thus, the way of adding the slip differs for each of those.
Many of those techniques (if not all) can easily be recreated at home, and produce beautiful results. Anyone can do them! I will try my absolute best to cover some of the most popular methods of applying slips to pottery, as well as go more into details about how the slips are made.
Pottery Slip Decoration Techniques
As I have already mentioned, there are multiple techniques that you can use, and all of them will produce different results. While all of them are relatively easy to recreate, some of them might require you to have some basic equipment. I will go over each of them separately and also mention all of the tools that you need.
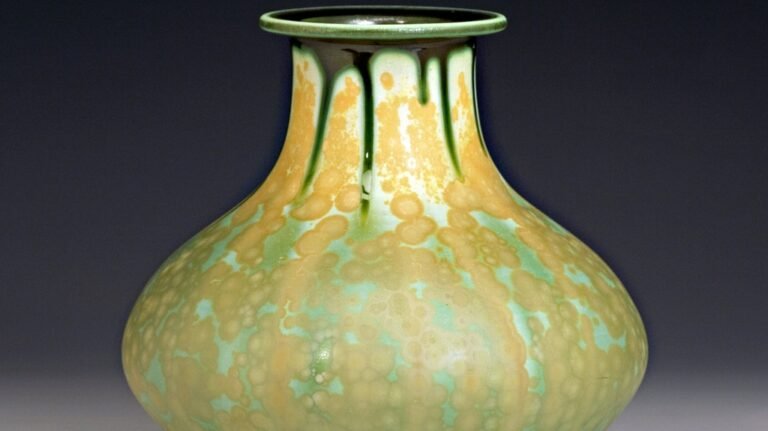
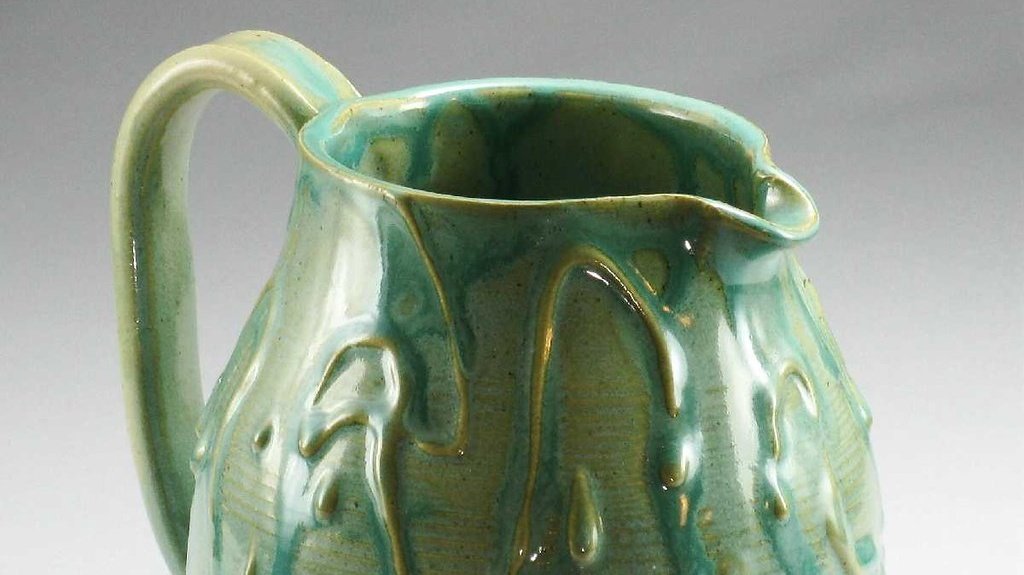
The simplest one could be trailing, as it doesn’t really require any complex skills (even though mastering it could create some breathtaking images). All you need to do is to put the slip in some kind of a dispenser that has a wide enough opening, and just let it trail over the pottery, controlling the flow and the direction. This is a very simple technique and requires minimal tools, and yet I am sure that you can create wonderful pieces.
Another technique that is directly related to trailing is marbling, so you can consider this technique to be an extra step added to trailing. After you’re done trailing, you need to move or shake the piece of pottery, thus moving the slips on it as well. But please, keep in mind that the outcome is very hard to predict, and the final look also heavily depends on how liquid your slip is.
And finally, there’s a different technique that is a bit more complicated, and yet the results are absolutely phenomenal. In this case you have to decorate the slip using a brush, and apply it in the areas that you want to cover. This is one of the oldest techniques out there, and the results really depend on your skill-level, patience and imagination.
Somewhat similar to the last technique is brush painting. In this case you can use several colors to create contrast, and add elements which otherwise would not be visible. While brushes are widely used, you can use other tools, such as sponges or your own hands.
What Is Slip Made Of?
Now that you know a couple of techniques, it’s time to discuss what slip is made of. The most basic explanation would be that it’s the mixture of clay and water, and the ratio might vary, making it more liquid or solid. While this concept isn’t too complicated to begin with, I will still try to simplify it as much as possible.
The process is fairly simple, but you still need to have some equipment. In this case, you will probably need a blender, and please use a blender that you will not use for food later on. The blender doesn’t even need to be that powerful, and as long as it’s still working, it can get the job done.
First, you need to put the clay inside of the blender, and add some water over it. Once you’ve done this, close the lid and let it sit there for a couple of hours or even overnight. Later, turn on the blender, and add water or clay to get closer to the consistency that you need (add water if it’s too thick or clay if it’s too liquidly).
And that’s it! Nothing too complicated and with a use of some basic equipment. And a little note: use the same type of clay while making the slip that you will use for your pottery.
Porcelain Slip Recipe
There are so many recipes out there that it’s very easy to get lost. The one that I recommend is very easy to do, and is suitable for beginners too. Plus, it can also be a lot of fun!
There are a couple of things that you need for this one: a piece of porcelain pottery that you don’t need anymore (broken porcelain pieces would work just fine), water, a container with a lid and finally some vinegar. None of those ingredients need to be fancy, but please make sure that the porcelain that you use is the same, or at least similar to the one that you will apply it on.
First, you need to break the porcelain into smaller pieces and put them in a container, until it’s about 50% full (more is acceptable too, just make sure it’s not too close to the top). After this, add some water until it covers all of the pieces. And finally, add a little bit of vinegar (just a small shot from the lid of the bottle).
One you’ve added all of the ingredients, close the lid and shake the container. After that, take off the lid, and stir it with a stick, softening the pieces. Leave the slip for about 15-20 minutes.
After that, shake it again, and start stirring for about 10 minutes. Or if you want to use a more intuitive approach, just stir until you get rid of all of the lumps, making it look as smooth as possible. If you’re still not sure about it being ready, stir until it’s closer to a heavy cream’s consistency. And that’s it, your porcelain slip is ready!