Can you use modeling clay to make clay rings?
Accessories are made of many different materials and choosing the base material would depend on the desired outcome or style that one wants to achieve. Aside from wearing accessories such as necklaces, bracelets, earrings, or rings, we can also enjoy them by creating our own pieces through arts and crafts. What is one of the easiest ways to create an accessory such as a ring made of clay?
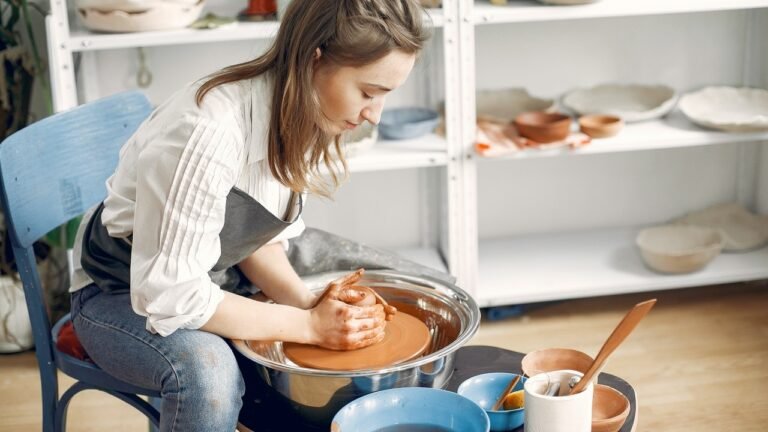
It’s best to make rings out of air-dry clay or polymer clay. Polymer is the most common clay to use as it is versatile and it makes the ring-making process quick and easy. Polymer clay hardens under heat, so you have to make sure to bake it with the right temperature (around 265 degrees) and duration (15-30 minutes) to make it durable.
Clay rings can give you a variety of different results. It’s a good DIY project to do especially if you want to explore styles, colors, and designs. With creating fashion pieces such as rings, all you need are your materials, your creativity, and your willingness to enjoy.
If you’re ready to let your creativity flow, this guide will help you cover the basics of creating rings with clay.
Can You Make Rings Out Of Modelling Clay?
There are various types of clay to choose from when making rings. You can either use air-dry clay, modeling clay, or polymer clay. These materials are light enough to be molded by hand and worn as accessories.
Choosing the type of clay is crucial since they serve different purposes and would yield different results as well. If you have a modeling clay at home and you’re planning on creating rings out of it, you have to consider the characteristics of this material. What exactly is modeling clay and how does it differ from air-dry or polymer?
Modeling clays may actually be very familiar to you. These are clays that come in a number of colors, shapes, and sizes. You can usually purchase them in your local department or craft stores and are also used as educational toys for children. They have a soft texture that makes it easier for you to mold and shape it on its own without needing water or other tools.
However, the common modeling clays you can get from your local stores are made to be used more than once. This means that this type of clay does not harden over time and is made to be reused or remodeled. Modeling clays are used for temporary projects and not for making accessories that you intend to wear.
Don’t be confused as the other types of clay are also called modeling clays as these are materials you can easily mold into different things. The modeling clay I’m pertaining to is those that are named as such on the box without polymer or air-dry written on it and are mostly used for enjoyment, educational, or temporary purposes.
What Kind of Clay Is Used for Rings?
Now that you know that the common type of modeling clay is not the ideal material to use, what about air-dry and polymer clay? Unlike modeling clay, these two types can harden and sustain their shape, but they also have distinct features. The process and duration of creating pieces may differ depending on if you choose polymer or air-dry clay.
Polymer clay is the one mostly used when making accessories out of clay. It is made out of polyvinyl chloride (PVC) combined with a plasticizer and hardens permanently when heated to around 265 degrees Fahrenheit. It is a versatile clay that comes in different colors and is very easy to manipulate into even the smallest piece you can make.
The advantage of using air-dry clay from modeling clay is that it can harden and maintain its shape after 1-2 days of drying it out. It is also a safer alternative for children than polymer clay since they don’t have to use an oven or a microwave when making pieces out of air-dry clay. It’s a material that’s easier to mold and is beginner and children-friendly so if you’re just starting out, perhaps you could start making rings from this type of clay.

Do Clay Rings Break Easily?
When using polymer clay, you have to learn to bake it at the right temperature. It should come out bendy, but if it came out fragile or brittle, then it must have been undercooked. It may take a few tries, but there are ways you can determine which temperature is right for your piece.
In order to create long-lasting and durable pieces, the temperature and duration of baking are important. Depending on its thickness, you would need to bake clay for up to 30 minutes, but if you are baking a thinner piece, it would need at least 15 minutes to harden properly. A good indicator of a properly baked clay is if you can slightly mark it with a sharp object but it won’t sink in.
A good thing about polymer clay is that it doesn’t break easily if cooked properly. The finished product also appears like plastic, so you don’t have to worry about it getting soaked in water. Pieces made of polymer clay are waterproof, but be careful to not subject them to direct heat as it may damage them.
In general, it may not be as durable and valuable as silverware, gold, or other materials accessories are made of, but polymer clay is more versatile in terms of shape, color, and style. It is safe and fun to make as a project for all ages.
How To Make Rings Out of Polymer Clay?
Making rings out of clay is simple and requires minimal tools. It’s perfect for beginners and a ring is a basic accessory that is easy to mold. Let me guide you through the step-by-step process of making rings out of clay:
Prepare your tools and ideas
Aside from your clay, prepare carving tools, aluminum foil and baking sheet, paint, and a glossy top coat (a clear nail polish would do). Then, you would want to layout your plan for what you want your ring to look like. Maybe have some cutout photos or colors for inspiration, but feel free to get creative along the way.
Soften the clay
Once you get it out of its container, start kneading the clay to make it softer. This will make it easier for you to mold and manipulate the material. Soften all the colors you will use so it would be easier for you to do the next steps.
Mold your piece
Next, get just the right amount of clay and roll it to form a log. You can either make the sides flat or keep it rounded, and incorporate various patterns such as weaves, layered rings, or stripes. Then, wrap the clay around your finger and measure accordingly — take your time as it’s important for the ring to fit nicely.
Bake your ring
If you are satisfied with the ring, you can seal it together and set it on top of the baking sheet and aluminum foil to prepare it for baking. Preheat your oven and cook it for at least 15 minutes. After baking, let it cool down for another 15 minutes.
Paint and design
Once it’s properly cooked, you can now paint the ring and incorporate various designs using markers as well. Get creative and try various color combinations. Watch out if you are painting on rings with intricate corners or molds, you would want to make sure that you are painting on the small corners or holes as well.
Seal with coat
If you are satisfied with your design, you can now cover it with a glossy coat so it has a nice shimmer finish to it. This is optional as some may want to give it a more matte finish.
You can make rings with clay with your own creative process, as long as you cover the basics. Just remember to choose the right material and bake it at the right temperature. Most especially, remember to have fun and let your creativity flow!